OK, let me start from the beginning so we don't get confused. lol The very first thing I do is put all the maps together into one big map. I use the original map files, with no mods, so I can go back to it later if I need to. It will look exactly like the one in my guide, without the text on it.
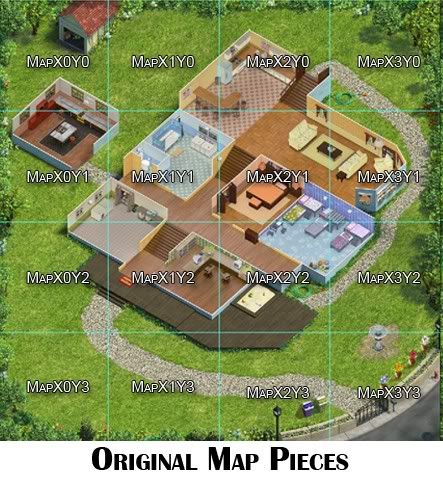
This will be your background map and will never change. To create it, first you create a new file with transparent background and with a size of 2048 x 2048. Then, add guides vertically and horizontally at increments of 512. Now, open each map piece and paste it onto your new image in the correct position. The guides should help it "snap" into place if you get close. Anchor them down as you go (you can always undo that with the edit menu if you mess up.) When done, you should have a map like you see in the game, with the guidelines showing you where each map piece is. Save this file as main map, whole map or whatever name you like, in the GIMP format of xcf. Whenever you want to work on the map, just add a layer and paste things onto the layers only. Never change the background.
Now, to make a room mod for the master bedroom (for example) just select that room using the free select tool. I use the walls as my "line" to "cut up" the rooms. It will draw straight lines between points if you click and if you drag it will draw a line following the mouse. Change the tool options so that if you stop a selection, you can "add to" the current selection, by starting again. This way you don't have to "draw" the whole room at once. When you have the flashing dotted line around the room, use Edit ->Copy then Edit -> paste as new image. Now, save the new image in xcf format and you are ready to begin editing it. Make your edits on new layers, so you can refer back to the position of things on the original when you need to. When you are done and have the room the way you want it, use Edit -> Copy Visible then open your whole map file (the one with the guidelines) and create a new layer named "master bedroom mod 1" or something. Paste the new edits onto that layer and zoom in so you can position it just right.
Now you should be looking at the entire map, with your edits on the master bedroom. With the guidelines visible, you can see exactly which maps you need to use to get your new mod into the game. Use the square selection tool and start at one corner of a map piece you need. The guides should make the selection automatically fit the 512 x 512 piece you need. Once again, use Copy Visible, then paste as new image and save the new image as a jpg image to use in the game. Repeat for each map section you need.
I hope that makes sense. I really wish I could just sit down and show it to you.


 Previous Topic
 Index
Index